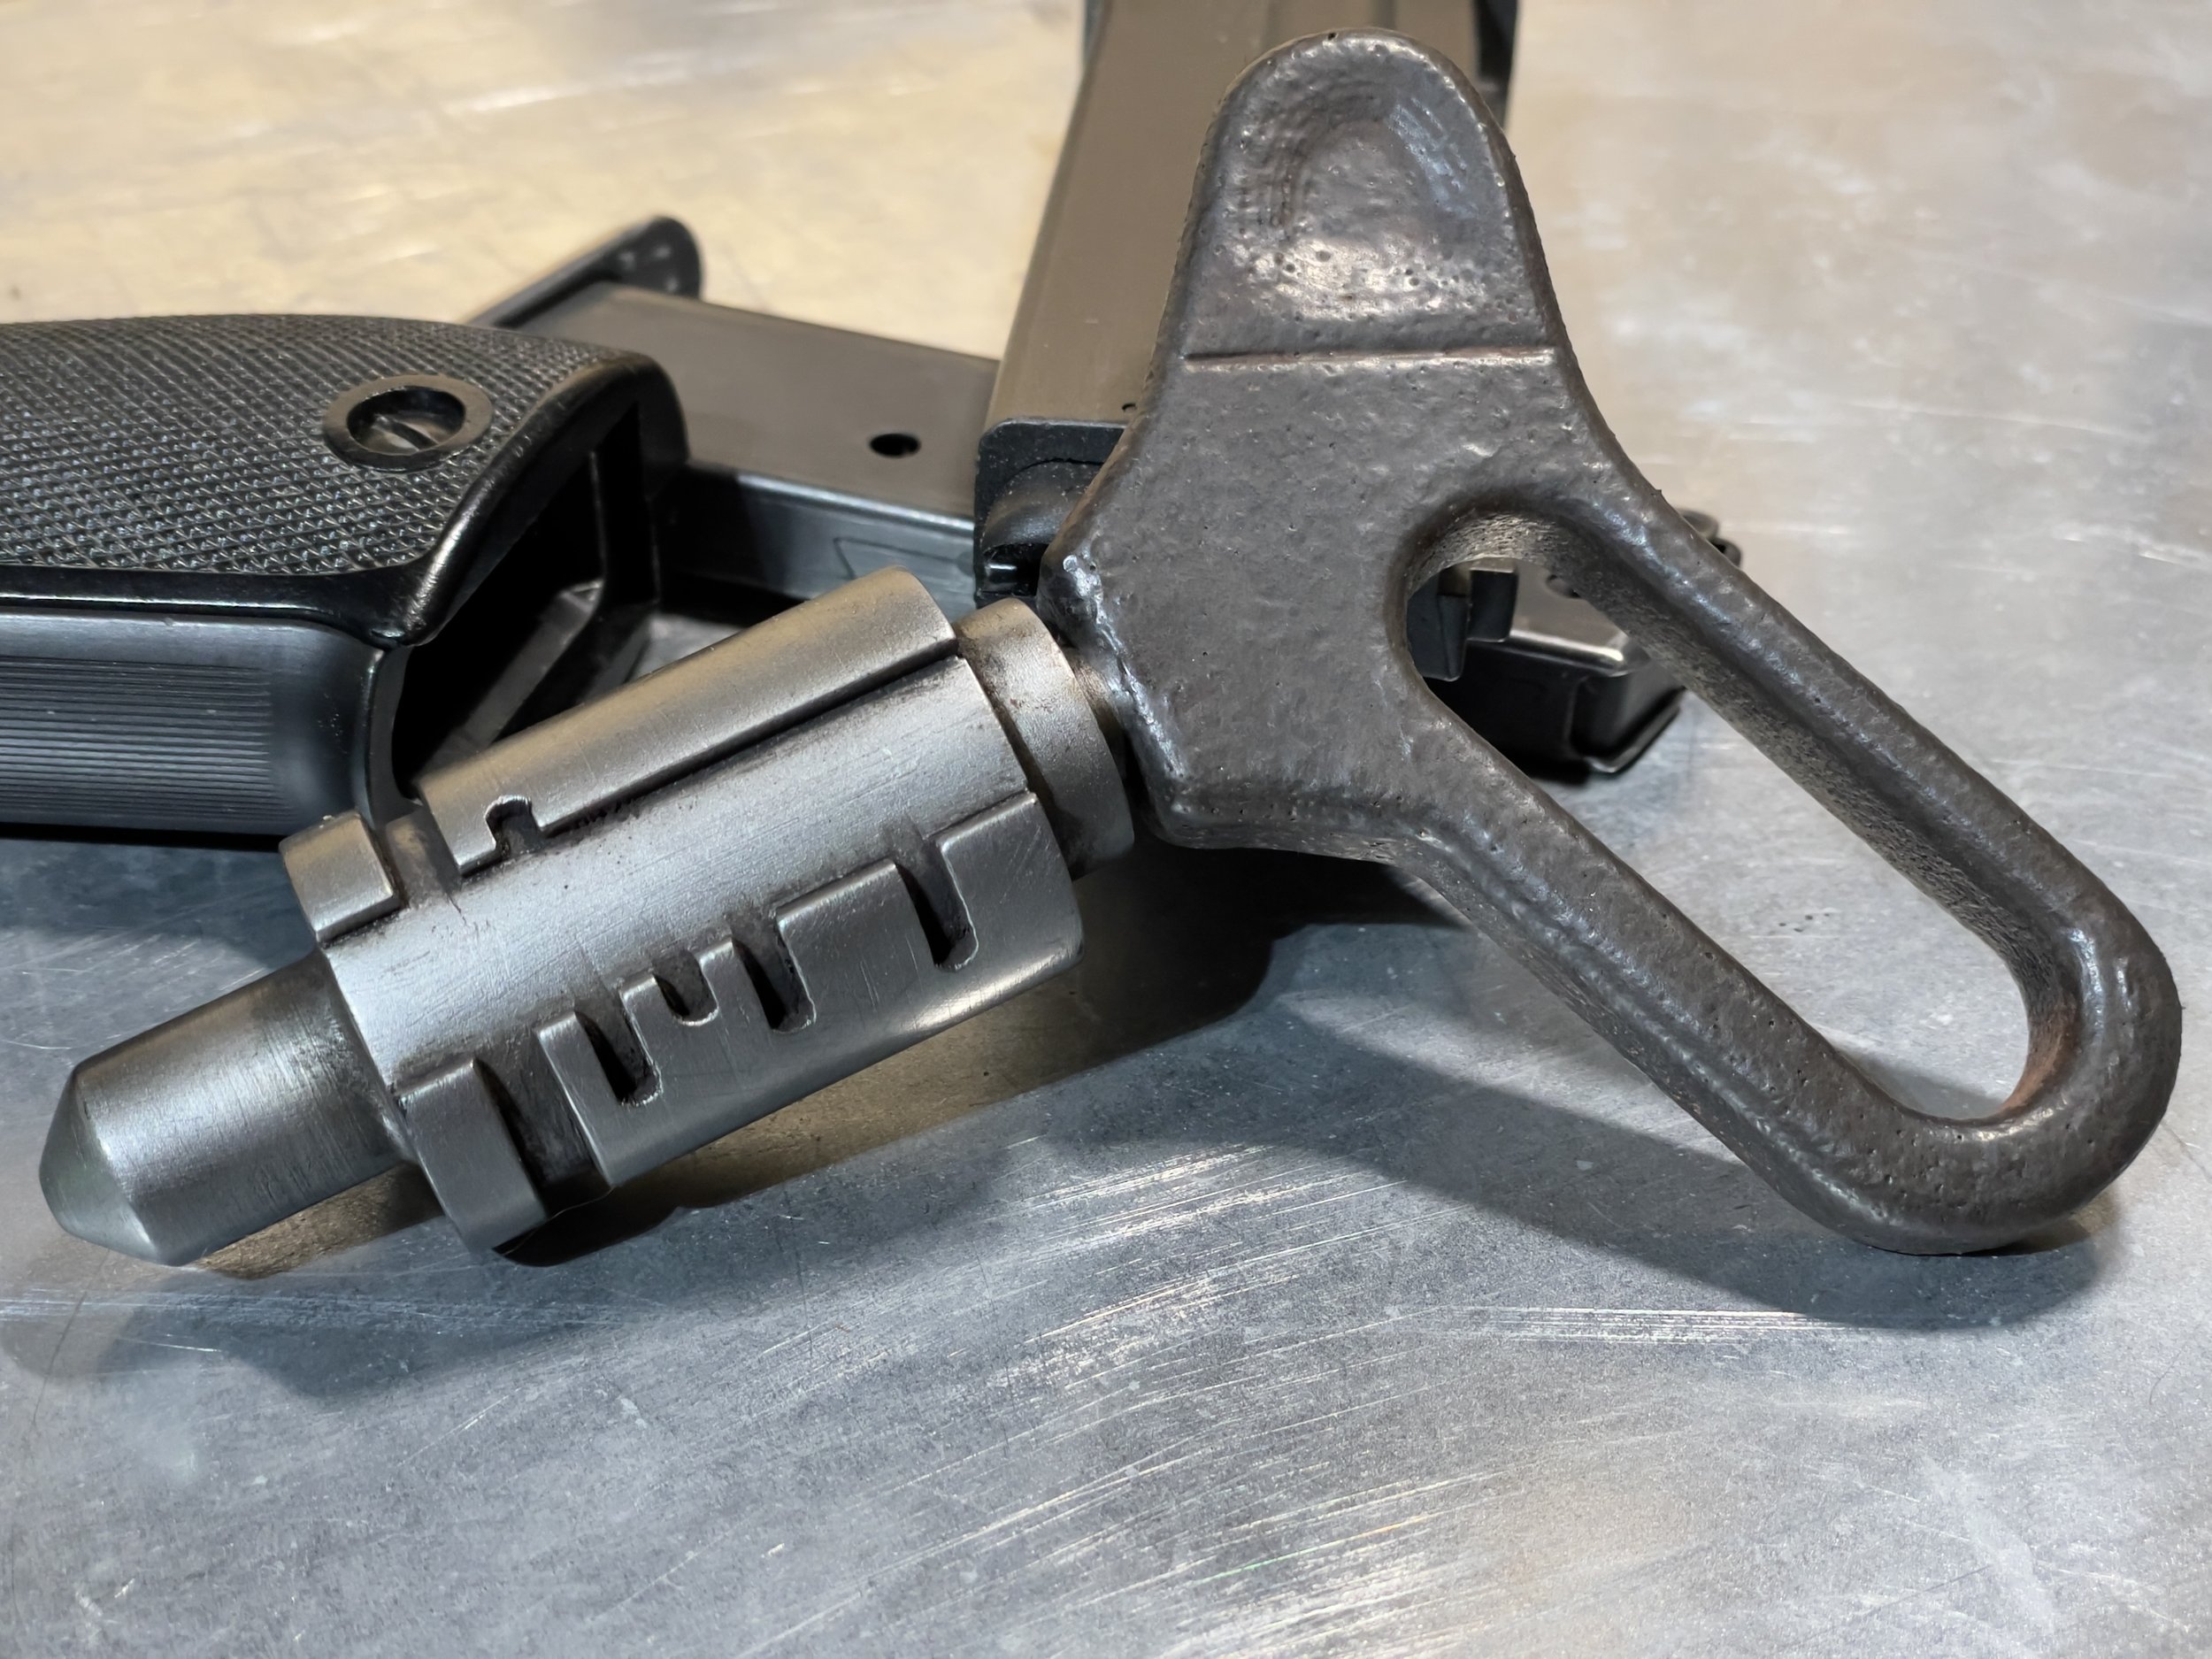
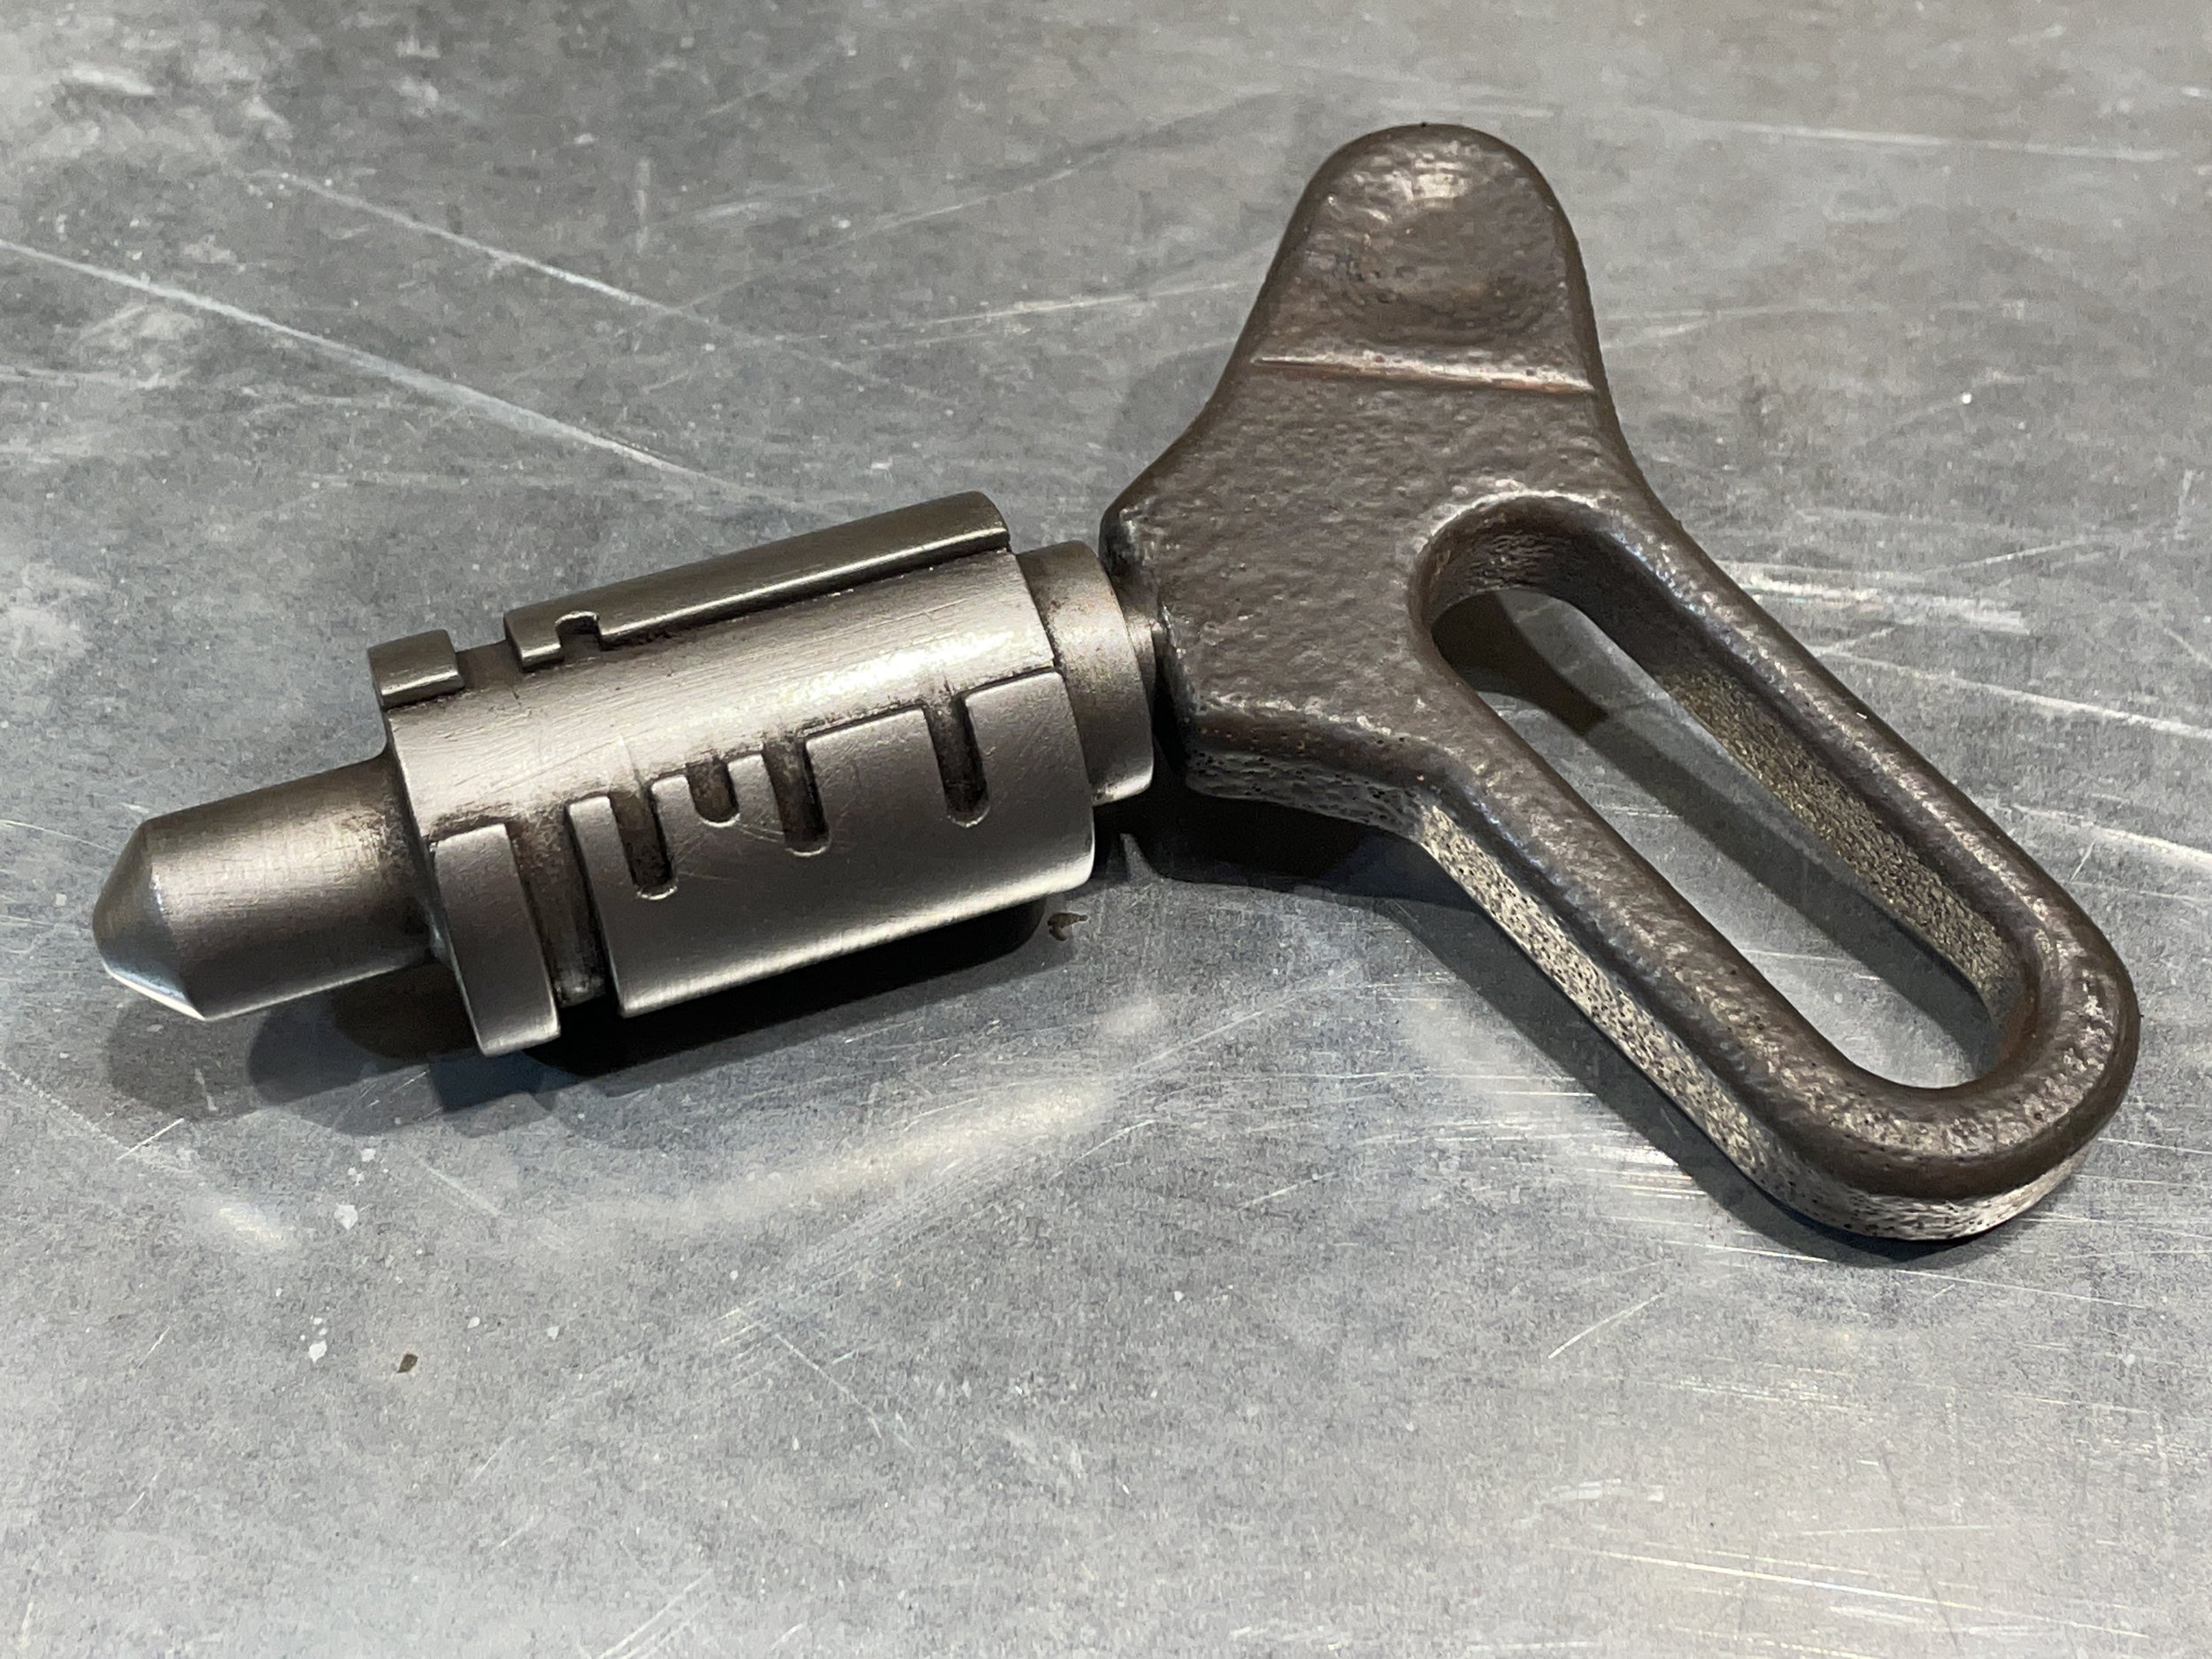
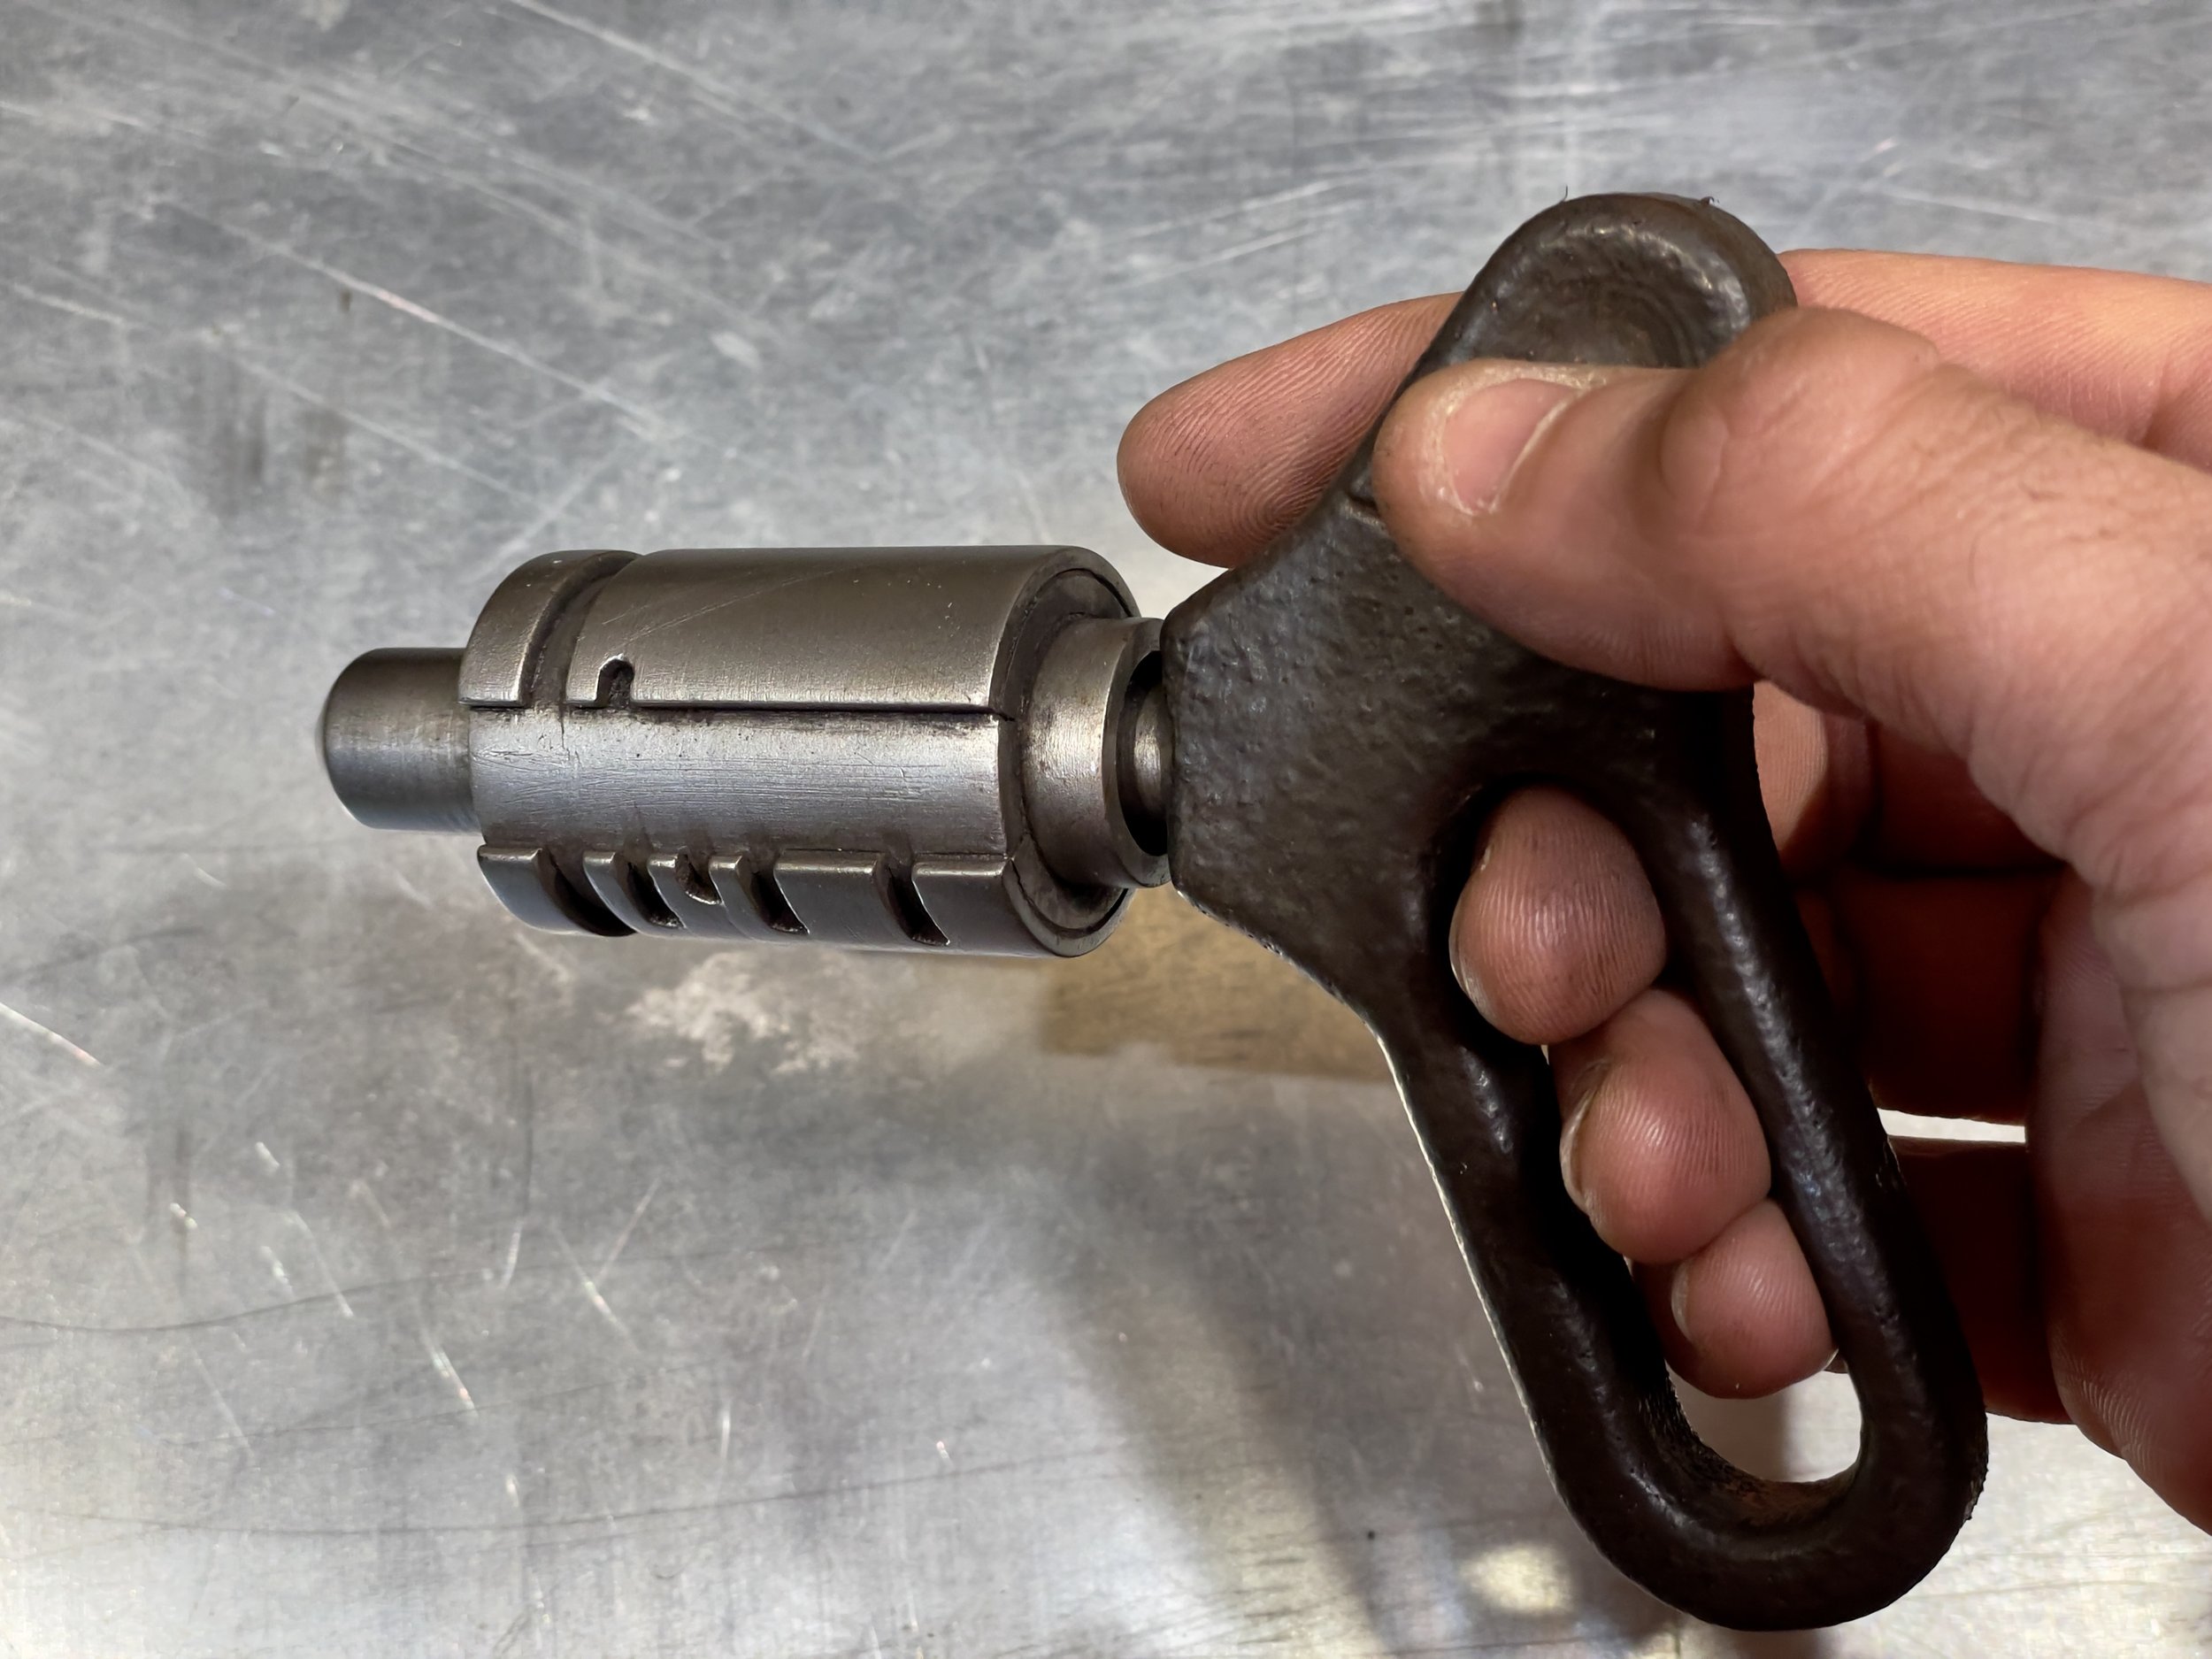
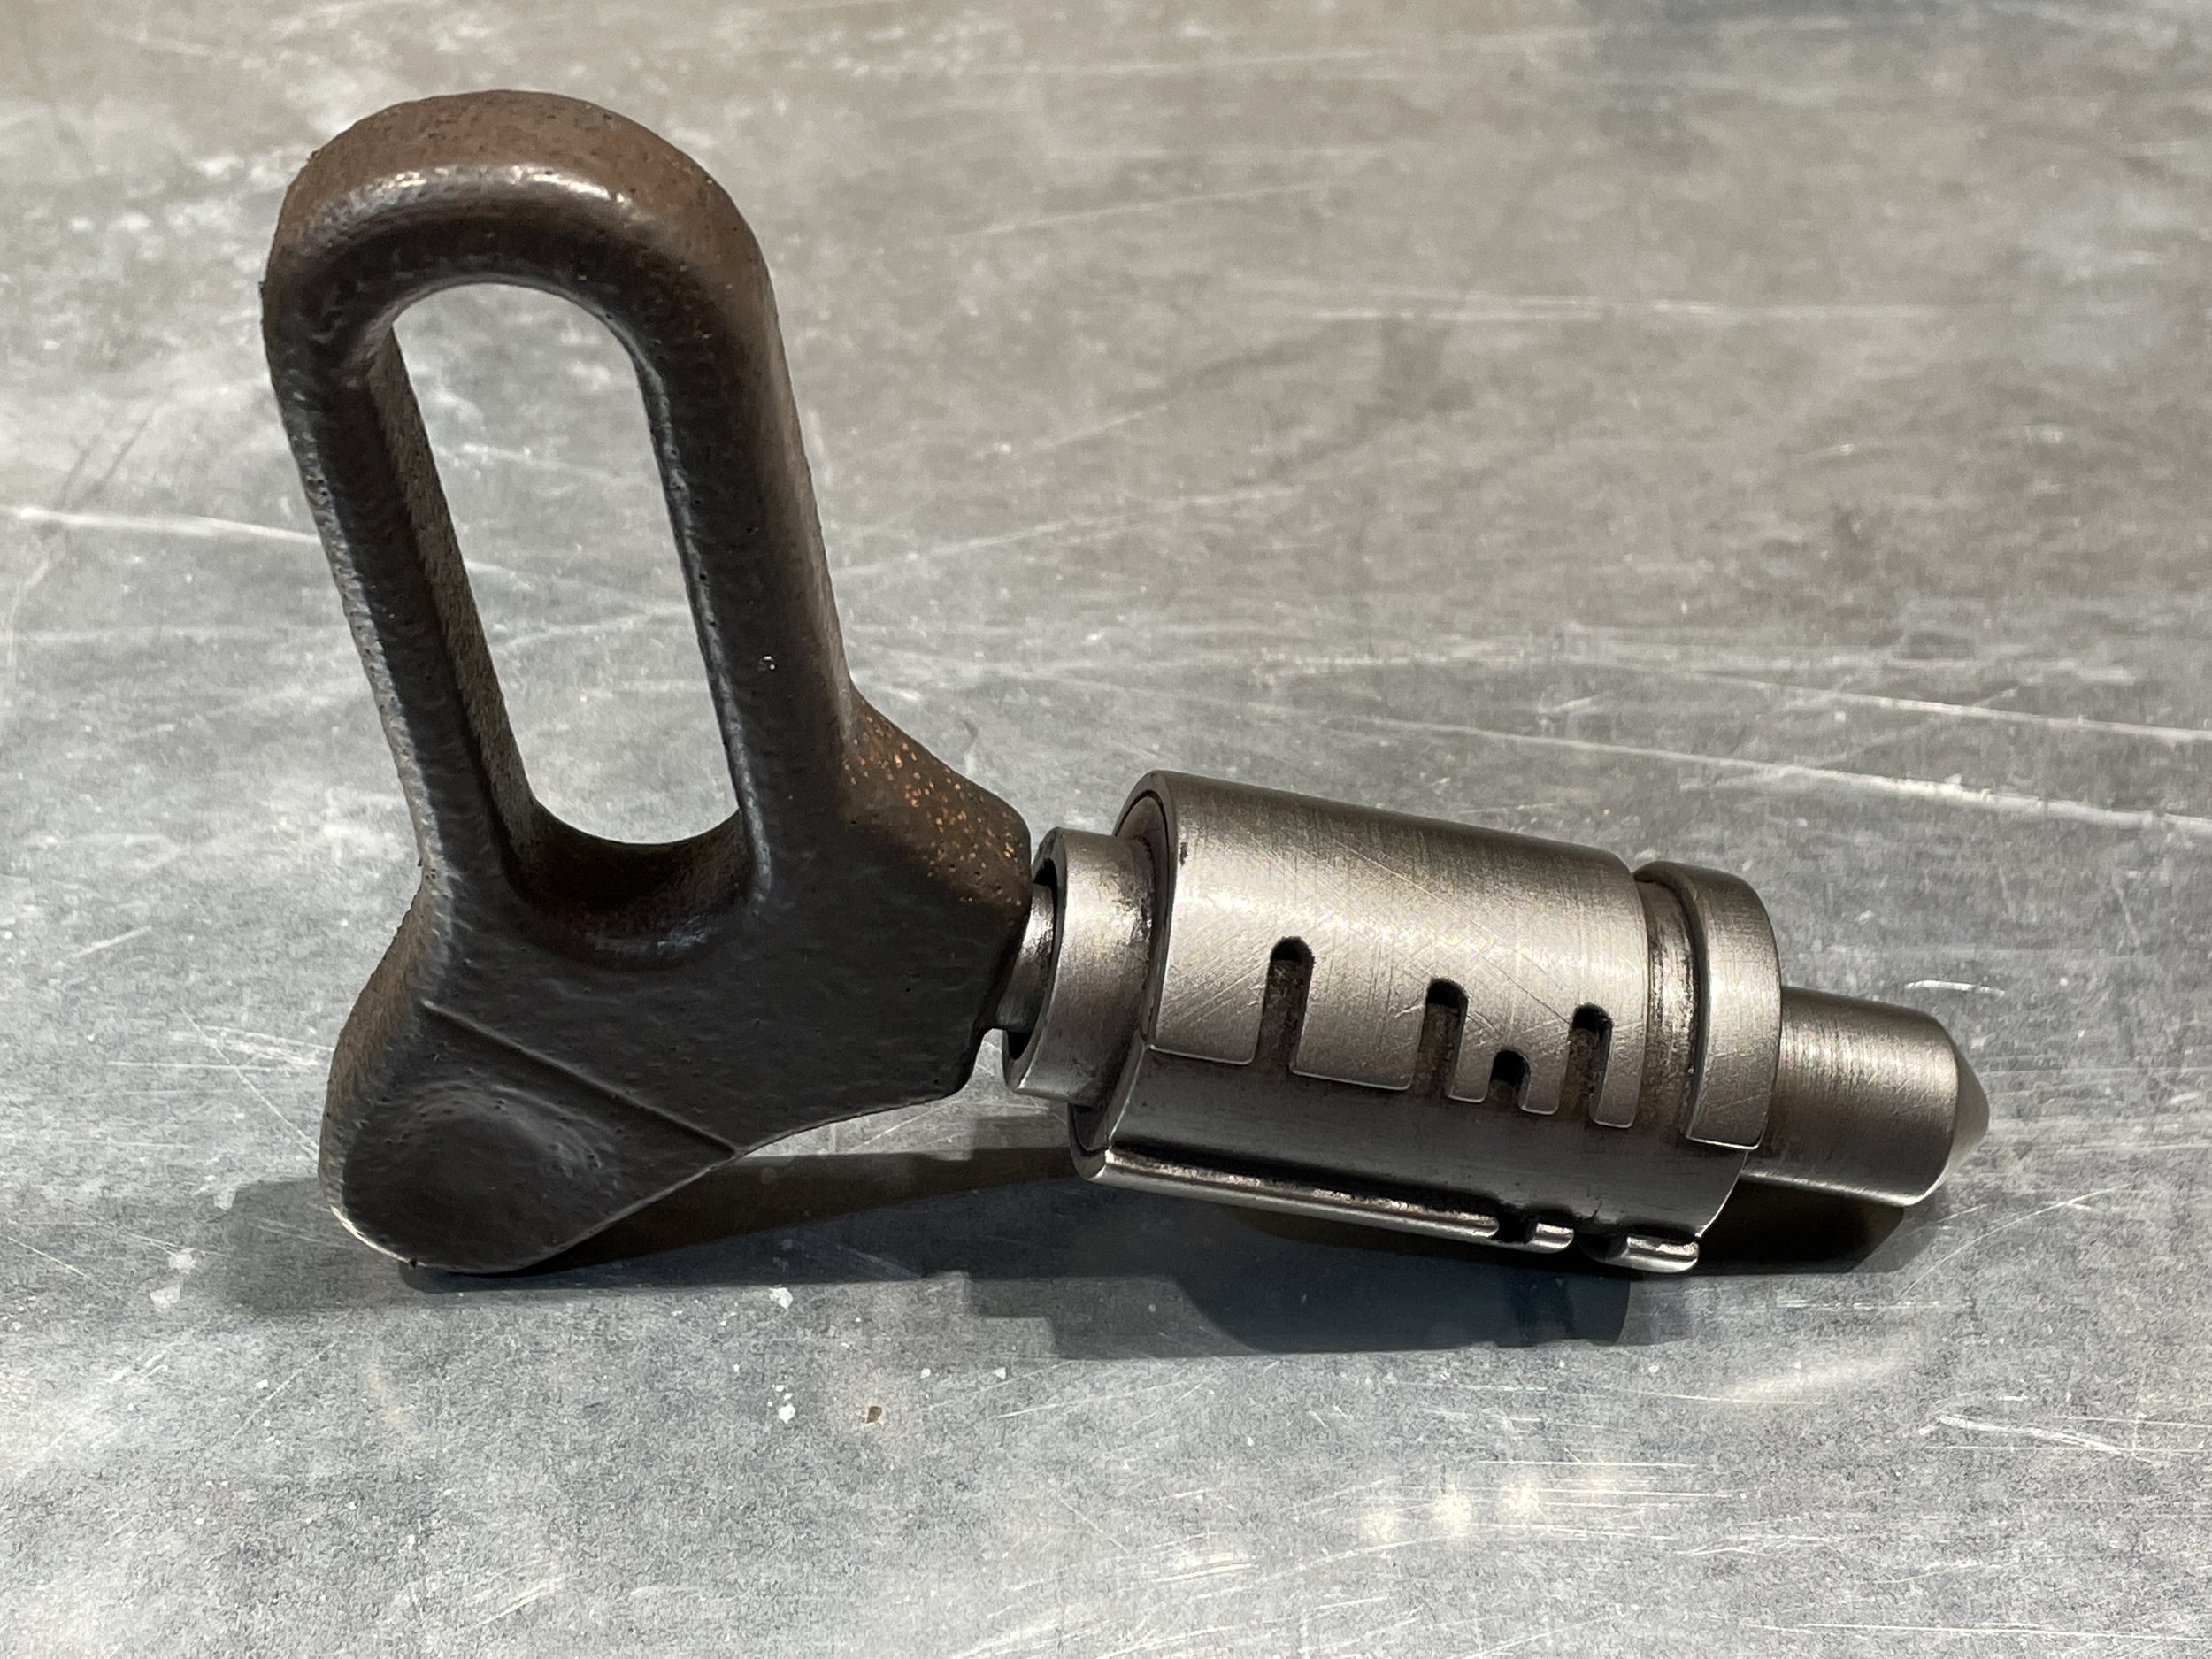
Build Log: Cowboy Bebop Zipcraft Keys
Hey Space Cowboy, did you lose your keys?
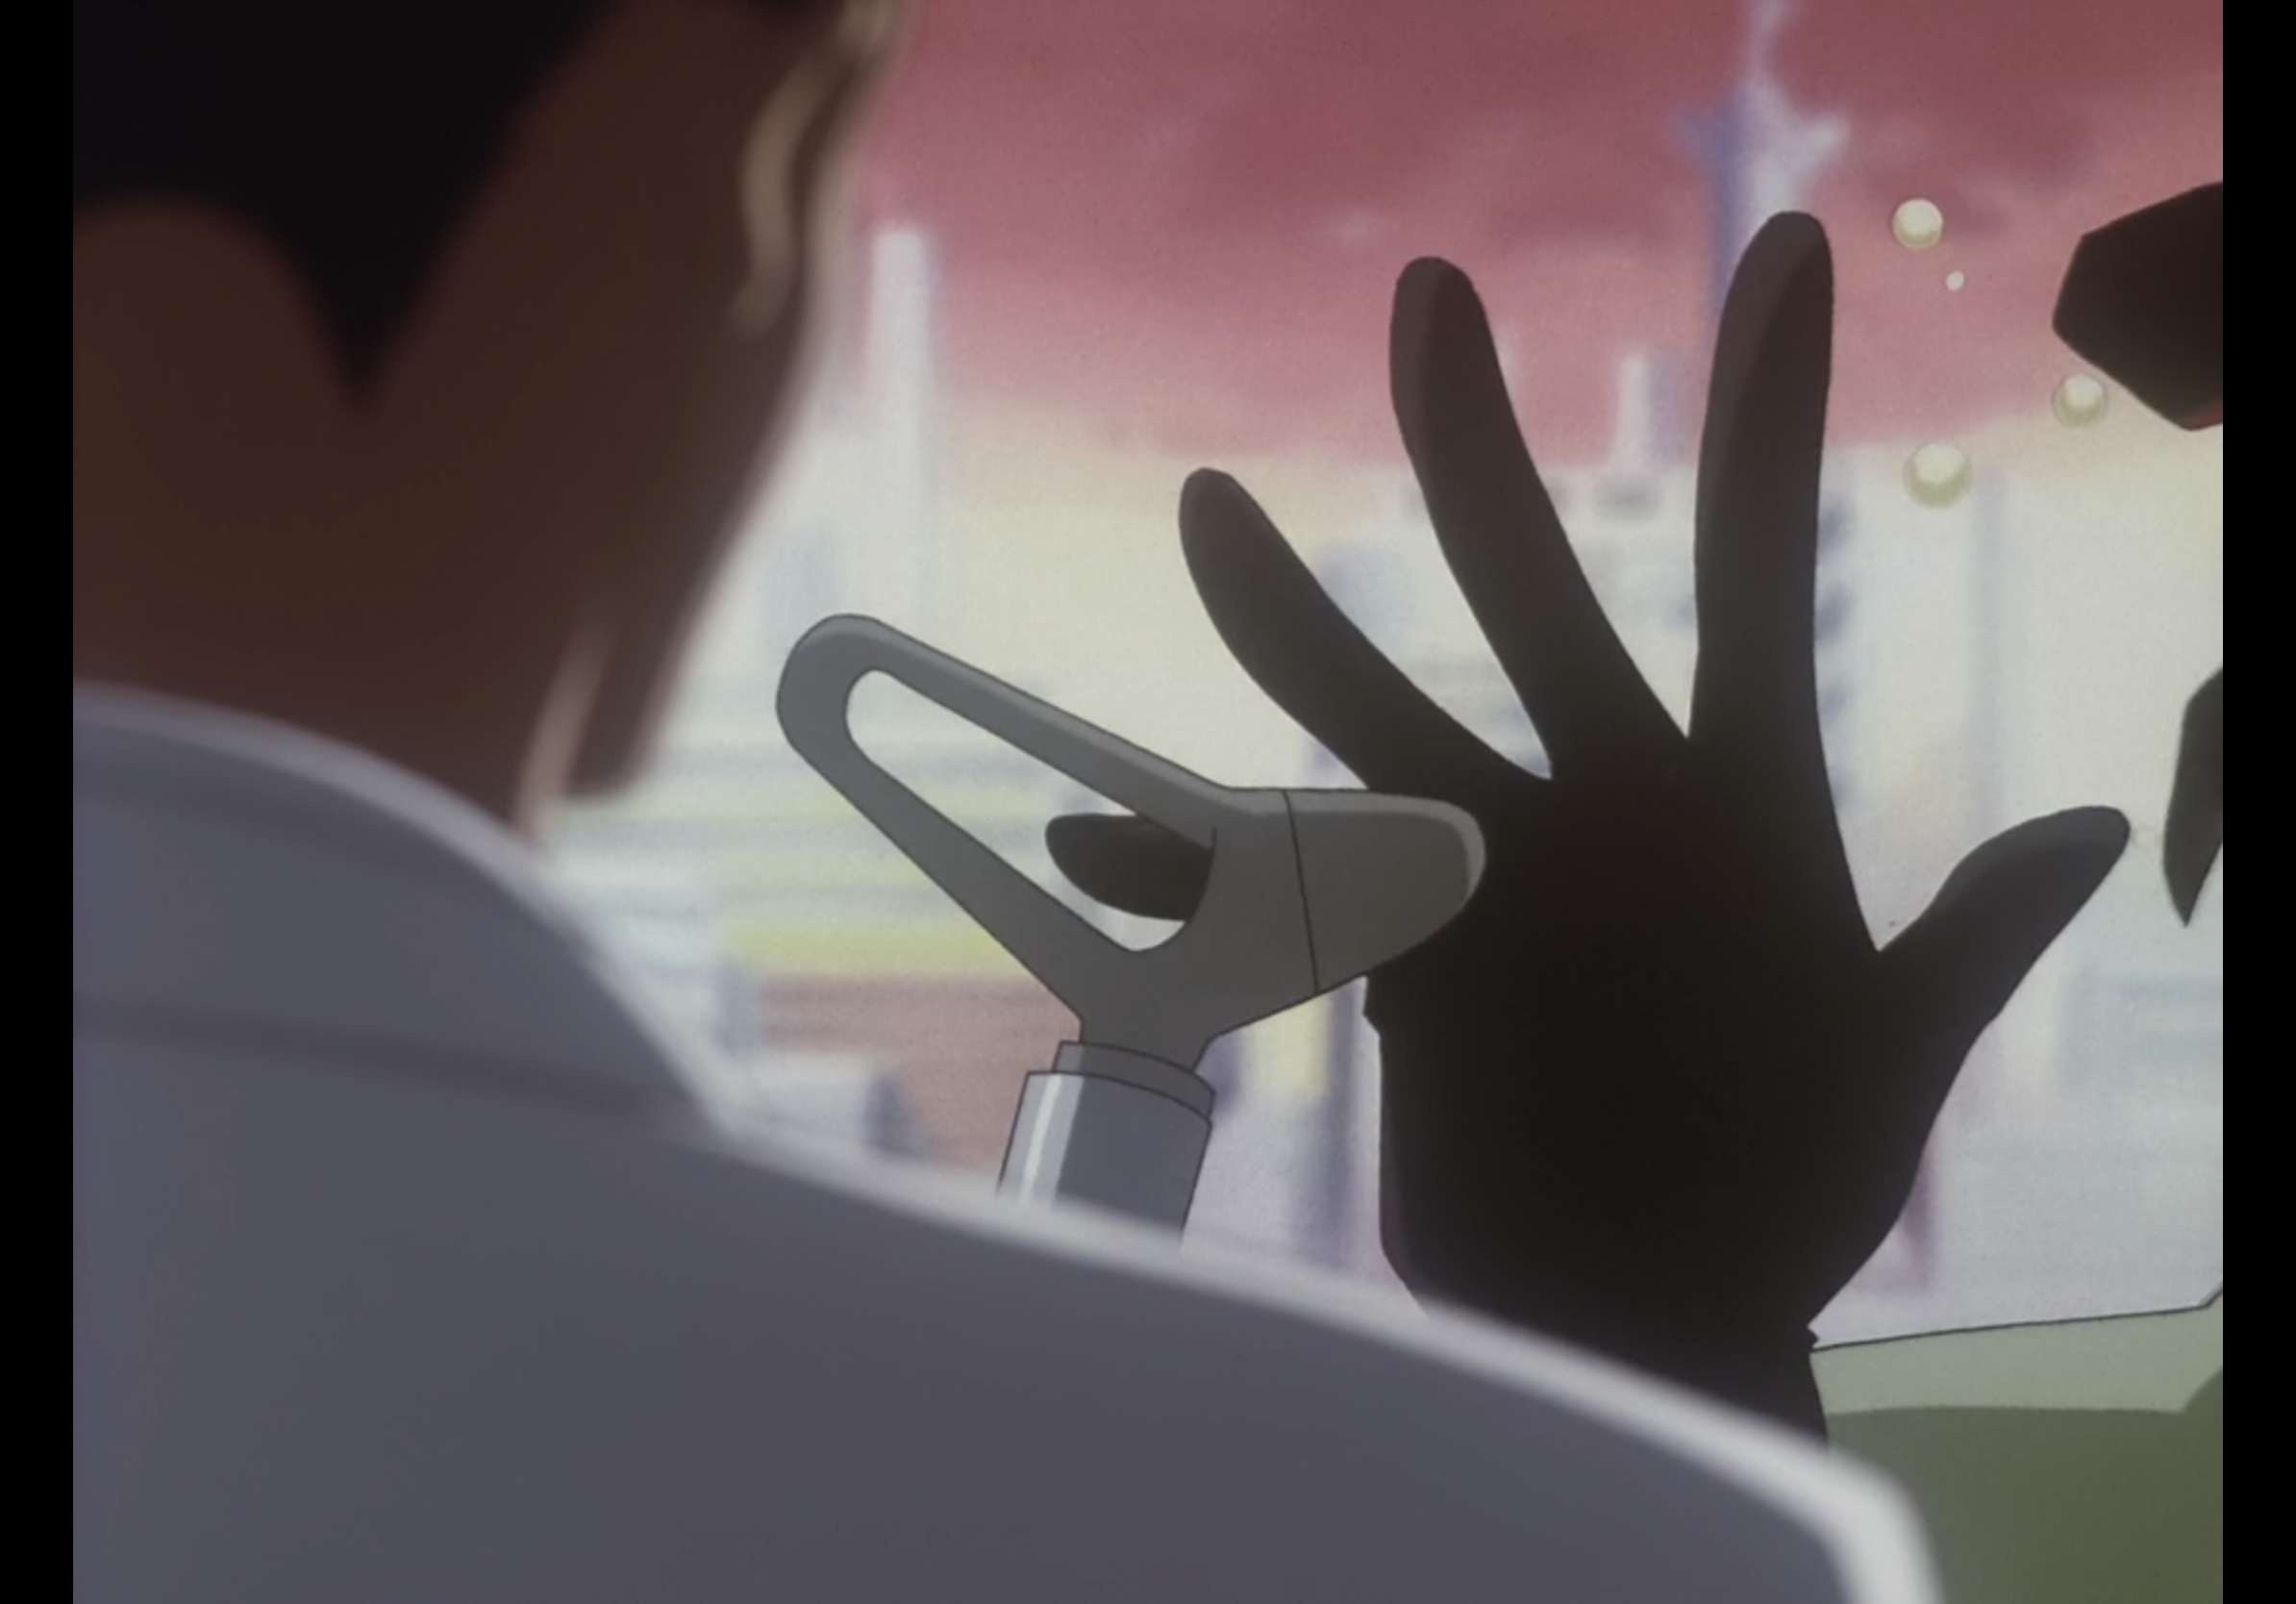
To prepare for the upcoming live-action Cowboy Bebop series, I restarted the anime and noticed a neat item just a few minutes into the first episode: Spike’s zipcraft key. The key appears five minutes into the first episode in a nice close-up shot. The keys appear later but are less detailed and drawn as solid cylinders. In this early shot, the key looks great and got me wanting to make one. It was a fun, quick build!
If you just want to dive in and make one yourself, the designs discussed below are available for free! You can download them from GitHub or PrusaPrinters.
The (Bounty) Hunt for References
First, I had to collect some reference images. The full key is visible at 5:27 in Asteriod Blues as Spike engages his zipcraft:
Slightly Skewed, But a Well-Detailed Shot That Shows Good Proportions and Scale
The handle is slightly obscured, but this is an otherwise near-perfect reference. The key is angled just enough to show the details near the handle while not distorting the perspective too much, so we have a rough idea of the length of the key, and Spike’s hand provides a starting point for sizing the image. The image also shows only one side of the cylinder is keyed or notched. A moment later at 5:28, Spike turns the fully-inserted key to show the other side is notchless.
The show also provides a head-on shot of the key handle which gave me everything else I needed. In episode 5, Ballad of Fallen Angels, Faye Valentine tosses her key to a valet at 6:31. The key handle looks slightly longer and more angular than Spike’s, but the show’s repeated use of this design suggests this general shape is shared by different keys.
While Less Detailed, This View Shows a Groove in the Handle Covered by Spike’s Hand in the Other Shot
The scene also shows the full key, but it’s much less detailed, appearing to just be made of some stepped cylinders. Faye’s key looks similar to Spike’s, so this is a great reference for the shape of the handle. However, Faye is smaller than Spike and the key doesn’t seem any bigger compared to her hand. It’s likely no one bothered to consider that during animation because it doesn’t matter to the show. I chose to size the key to Spike’s hand-i.e., size it to an average hand size for a 6’ 1” man.
Sizing it Up
To get the right size, I opened the screenshot in Photoshop, but I could have used a free program like Inkscape. Anything that can scale images and draw a box would have worked.
I held my thumb in the same position as Spike and grabbed some rough measurements using digital calipers. I made a box that was the size of my thumb and scaled the reference image layer to about 33.82%. Once Spike’s thumb fit inside the box I rotated the image to straighten the key. The key in the image fit inside a box about 137.94mm x 85.73mm or 5.43” x 3.37”. That felt good enough to begin modeling, so into Fusion 360 it went.
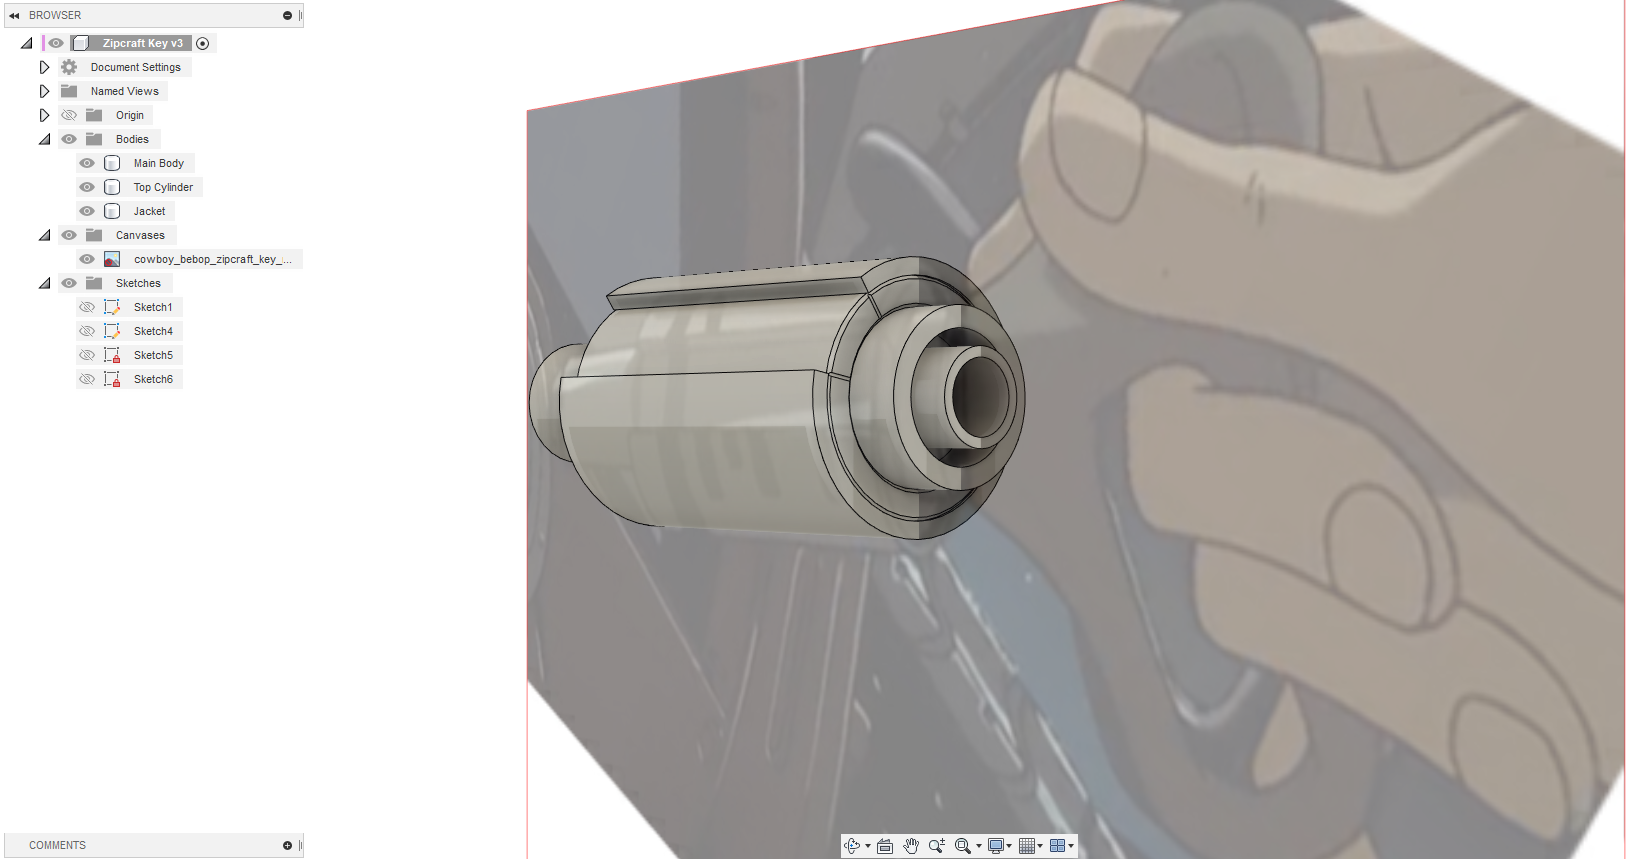
The scaled and rotated image went into Fusion 360 as a canvas I could draw upon. I lined up the canvas as best I could to help me sketch some rough dimensions. After accounting for the angled perspective, I had a profile I thought looked appropriately sized.
Rough Sketch of the Top Half of the Key’s Profile
I wanted this to be an easy model for anyone to print using FDM or resin printers, so I had to make some choices here.
I started by making the key body (the big cylinder and the skinnier, chamfered cylinder) its own body using the Revolve tool. Next, I made a sketch on the cylinder’s top flat surface to draw the notch and top details. These top details suggested the key would be assembled from multiple pieces and sanding inside the keyed notches could be a pain, so I decided to make the main body two separate pieces: the outer keyed jacket and the inner cylinder.
I cut the V-shaped grooves into the main cylinder using pipe forms, added some chamfers to accentuate the seams a tad (and help with ‘elephant foot’ issues on FDM printers), and made the top cylinder for the handle to connect. I made it so this last cylinder 1.2mm taller to fit into a 1.2mm deep cut-out in the main body. This would help with gluing it into place later.
This separation served several purposes:
Fewer supports would be needed to print the main body on an FDM printer
What supports would be necessary would only touch surfaces that would be covered by the handle assembly
The final product would look much more like separate pieces because the seams would be real
The rod/cylinder for the handle (~11mm wide) looked like it fit into a wider hole about 15mm wide, so I added this feature to the top cylinder. I also cut an 8mm hole through the entire key assembly to fit a brass rod. I had some 8mm x 100mm brass rods that came in a set I bought when I needed some smaller rods for another project. I rarely have a need for 8mm rods and one of them running through the key would reinforce the handle and add some nice heft to the final prop.
Here was the final-ish rough key body:
Taking Stock of the Progress
Getting a Handle on the Design
I imported the screenshot of Faye’s key into Fusion 360 and scaled it to match Spike’s key handle. Unfortunately, the keys were a poor match. Faye’s key had a slighter handle with a finger hole that narrowed more sharply. Enough of Spike’s handle was visible to use the episode one reference for the sketch and Faye’s key as a guide for some additional details.
Comparing Faye’s and Spike’s Key Handles
I did my best to carefully outline the handle using a Fit Point Spline and then used the Slot tool to make the appropriate cut for the fingers. Then I just needed to figure out the thickness of the handle. In the screenshot, Spike had a good grip on the key and it easily sat between his knuckles, so I determined the handle was at least 10-12mm thick (based on my own fingers). Considering the post that goes into the handle was roughly 11m, I settled on the handle being 12mm thick.
I filleted the edges of the handle for the rounded-over look seen on the keys in the show and then added the small key notches to the outer cylinder. Fusion 360’s Emboss tool made it simple to add the key notches. This tool is capable of embossing or debossing a sketch on a curved surface. The model started to match the screengrab.
First Revision Fits Well Within the Asteroid Blues Reference
Finishing Touches
The key was looking alright at this stage. It just needed some additional details, like the line across the handle (as seen on Faye’s key). I added the line on both sides of the handle along with a slight dip where Spike’s thumb rested in the reference image. The keys looked like they might have some sort of indentation to help the user turn the key to the right or from being worn down from heavy use.
I made some adjustments to refine the shape of the key and tried rendering a final version. It looked pretty close to Spike’s key if a little too clean.
The Final Render Before Testing Printed Parts
Test Flight
I exported the parts as STL binary files and loaded them into my slicer. I painted on supports in a few areas with large overhangs (the outer key jacket and the slot for the handle). The slicer estimated a little over 4 hours with a standard profile for my printer.
All the Parts Ready for Printing in ASA on an FDM Printer
Normally, I would print individual pieces to test them, but this is a small item without any complicated bits.
The first print showed me the handle’s fingers slot was maybe a little smaller than it needed to be, but it was hard to tell. When I held it like Spike in the reference image, I couldn’t fit three fingers in the slot. He had two fingers in the slot, but it was clear his pinky could fit alongside the other two. My fingers are thicker than Spike’s, so I could have gone either way. In the end, I decided to add 12mm to the length of the slot (enough to fit my pinky).
I also made a few small tweaks:
1mm chamfer at the base of the skinnier cylinder on the end of the key
Deeper thumb depression on the key handle
Deeper/thicker lines cut into the key handle
The chamfer looked nice and reinforced the model. The other changes accommodated my plan to lightly coat the handle in something like SmoothOn Urecoat or PlastiDip for a rubber texture. I didn’t want these details to be washed out or filled by the rubber. Also, on my FDM test print, the detail lines on the main cylinder were lost when printed against the print bed. The channels were only .4mm wide and .2mm deep-i.e., just one nozzle’s width and one or two layers deep.
Time for Ignition: Test Assembly
I printed each piece in Anthracite Grey Prusament Tough Resin on my Prusa SL1S printer. The grey color of this resin works well with parts to be painted with metallic lacquers. If the paint were to chip down to the plastic, the grey would look like it belonged alongside black primer and a weathered metallic topcoat.
Pieces Sanded and Ready for Assembly
I cleaned up the support material and test-fit everything with the brass bar at the core. If anything didn’t fit due to a print defect or shrinkage I needed to know that immediately before investing time into the part.
The parts fit really well, but I discovered gluing the outer jacket wouldn't be as simple as I had expected. First, I made the mistake of using BSI Insta Cure CA glue and applying glue to the main body and jacket. The glue on the main body set as I slid the larger jacket over it. It was impossible to reposition. I tried a second time the same glue worked fine but I wasn’t happy with it. The whole business was too easy to misalign or screw up.
I returned to Fusion 360 and added a very small 0.4mm chamfer to the edges of the jacket before combining the outer layers with the main body. The chamfers were just enough to make a fake seam, an area that would capture some paint during later weathering washes.
As an alternative, I also created a version that involved some fan fiction. In the world of Cowboy Bebop, all keys like this probably share a common core (the handle and inner cylinder). It’s the outer jacket with the notches that would be keyed to a particular zipcraft. To answer how a manufacturer would assemble a key and make the model a little more visually interesting, I added screw holes to the jacket opposite the notch. The holes fit M3 grub screws that can hold the outer jacket in place if printed separately.
Key with New Grub Screws Fixing the Outer Jacket in Place
Final Assembly
I fixed the top piece and brass rod in place with some 5-minute epoxy and taped off the rod to keep it clean for later. Then everything got a coat of Alclad II black microfiller primer. After I polished the primed surface with some micromesh, the key got a coat of Alclad II duralumin lacquer. I wanted a lighter-colored metallic finish that wasn’t as bright and shiny as their polished aluminum.
Assembled and Painted Key Pre-weathered with Scratches from a Scotch Brite Pad
For the handle, I had a small amount of SmoothOn UreCoat, a brushable urethane rubber. UreCoat is a translucent amber color. The key handles in then show all appear as some sort of khaki or brownish-grey color, so I mixed in some brown dye with a little yellow and white. I stuck the handle on a wooden dowel and brushed on the mixture.
It was a disaster. I had so little UreCoat on hand that I couldn't mix multiple batches. That was a problem because the pot life of UreCoat is about eight minutes. Brushing the rubber onto a smooth surface proved to be difficult and required working slowly. The rubber thickened faster than I could work. I went to school with that experiment.
With the UreCoat spent, I tried a different idea: truck bed liner and PlastiDip. I love truck bed liner for adding a texture to surfaces and it’s really tough if the prop might get beat up. I sprayed a few light coats onto another handle to get a stippled texture. Then I sprayed on three light coats of black PlastiDip. This gave me a nice rubberized handle grip. The color was wrong, but the end result felt much better than a painted surface. In the future, I intend to try applying truck bed liner and then one or more coats of tinted UreCoat to achieve this effect in other colors.
PlastiDip’d Key Handle with Truck Bed Liner Texture
I let everything cure overnight before I permanently attached the handle to the brass rod with more epoxy. Next, I applied a topcoat of Alclad II Aqua Gloss to protect the paint from weathering paint washes. The weathering consisted of a few washes with water-mixable oil paints in brown and black colors. I added a little extra grime with one of my new favorite weathering pigments, Ammo by Mig’s metal slag weathering powder (https://www.migjimenez.com/en/ammo-paints/1140-metal-slag.html).
All that was left to do was wait the days/weeks for the oil paint to dry, but worth it for the greasy finish on my new Sci Fi zipcraft key.
